Scrapbooking is a fun hobby you can take up during your free time. It’s a creative way to preserve the beautiful memories you made with your friends and loved ones, whether it’s over a holiday or during the simplest of occasions like a birthday party. A scrapbook can also be used to record certain milestones that we wish to remember in our lives like the moment your toddler started taking his/her first steps or the moment he/she uttered the words “momma” for the first time.
What is a Scrapbook
For starters, if you’re still unclear what a scrapbook is, here’s a simple definition. Essentially, a scrapbook is a book or album that is used to tell the stories of our lives. This is done by arranging photos, with wordings, embellishments and all sorts of scrap paper and material you can find within the pages of the book or album. The result is a beautifully-decorated book with memories you can look back on and cherish forever.
Basic Supplies/Materials for Making a Scrapbook
Before getting into the steps for making a scrapbook, here’s a list of the materials and supplies you’ll need.
1. An Album or Empty Book
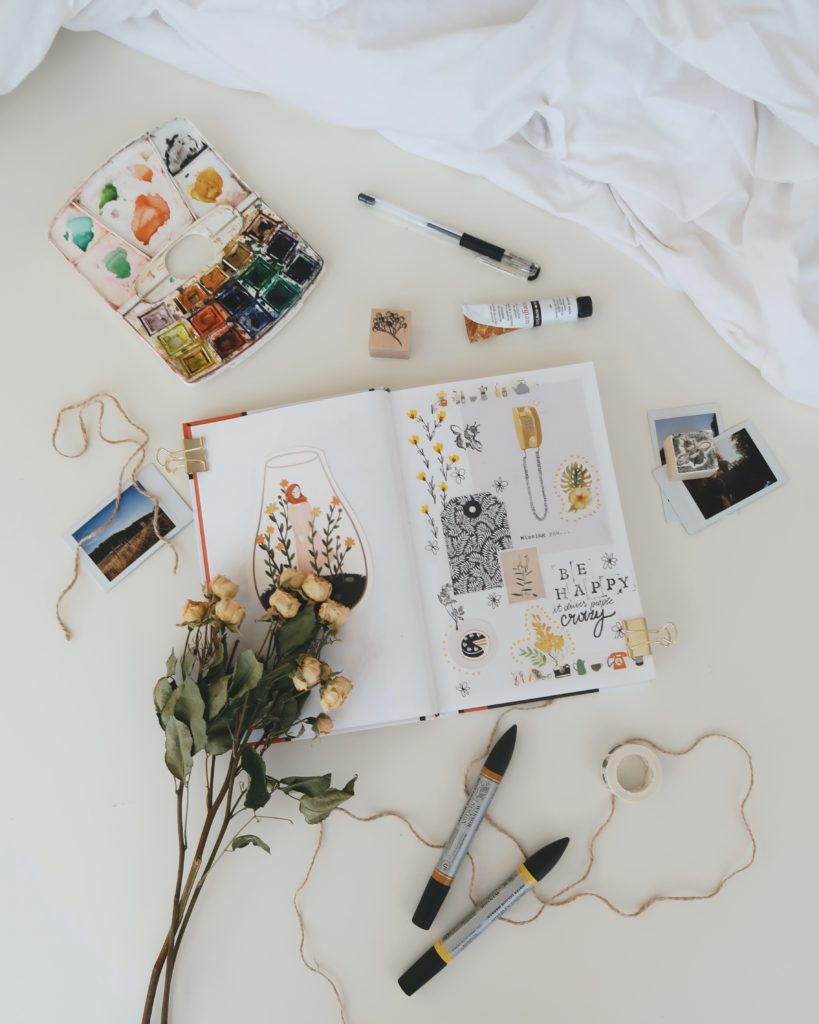
First and foremost, you will need an album or empty book to house your beautifully-decorated scrapbook pages. Scrapbook albums come in a variety of sizes and dimensions. Choose whatever size you fancy. Or if you prefer a regular book with blank pages, that’s fine too. Your album or book will serve to protect the layout or design of the scrapbook pages within for your viewing pleasure.
2. Coloured/Patterned Papers
Next, you will need coloured or patterned papers. You can use all sorts of paper to decorate your scrapbook. Besides choosing from a variety of coloured papers and patterned papers available in stationery shops, you can also salvage paper from old greeting cards and envelopes to decorate your scrapbook. I have been making use of the beautiful designs cut out from old angpow packets to decorate my scrapbook. The paper salvaged from old wedding cards and envelopes also have lovely textures and patterns that you can use as a backdrop for your photos and other scrapbook elements.
3. Adhesives
Another important supply you will need for scrapbooking is adhesives. You can choose from a variety of options from glue sticks and liquid glue to glue tapes and cellophane tapes.
4. Writing Utensils
Since you will also be writing in your scrapbook (you may want to write page titles or include some journaling), you will need writing utensils. So go ahead and gather as many utensils as you want from coloured pens and coloured pencils to markers and highlighters.
5. Scissors
You will also need a pair of scissors to crop out your photos and cut down your coloured/patterned papers to the desired sizes.
6. Embellishments
Now on to the fun part – embellishments! To further beautify your scrapbook pages, washi tapes and stickers will do the trick. Besides these, you can even use dried flowers, buttons, ribbons, fibres and sequins as embellishments.
Basic Guidelines to Making a Scrapbook
After you have collected all the materials and supplies needed, you can proceed to make your scrapbook. If you haven’t made a scrapbook before and don’t know where to start, here are some basic guidelines.
- Choose a Topic
You can start by choosing a topic or theme for your scrapbook spread. Think about a moment or event in your life you would like to document. Then, create a topic based on that moment or event. For example, you may want to document your “Travels Abroad” or your “Graduation Ceremony” or “Dad’s Birthday.”
- Choose Your Photos
After choosing the topic for your spread, you can start searching for photos you took that are related to that topic or event. You may have collected a lot of photos but just pick a few favourites for your spread.
- Choose Your Layout
Next, choose your layout or how you would like your photos and other scrapbook elements to be positioned. There are many layouts you can experiment with. Here’s a tip for determining a good layout. First, choose a focal point or a point on your spread that you want your readers to be drawn to. For example, if your focal point is a particular photo, try an arrange the other elements on your spread in a way that makes that particular photo stand out.
- Adhere Your Photos and Other Elements
Once you have determined the layout for your spread, you are ready to glue all your photos, scrap papers and embellishments in place.
- Wordings and Journalling
Besides coming up with attractive page titles, you can also include some quotes and journaling to complete the spread. It’s up to you if you want to handwrite or print out the wordings. Always remember to leave spaces for the titles, quotes and journaling you would like to include.
Random Rose is a content writer under Headliner by Newswav, a programme where content creators get to tell their unique stories through articles and at the same time monetize their content within the Newswav app.
Register at headliner.newswav.com to become one of our content writers now!
*The views expressed are those of the author. If you have any questions about the content, copyright or other issues of the work, please contact Newswav.